Ceiling Water Leak Repair: 4 Easy Steps Guide
Introduction: What to Do When You Spot a Ceiling Leak
Ceiling water leak repair starts with quick action to prevent further damage and mold growth. Here’s what you need to do right away:
Immediate Steps for Ceiling Water Leak Repair:
- Turn off electricity to the affected room at the breaker box
- Place buckets and tarps under the leak to catch water
- Shut off the main water supply if the leak is still active
- Document the damage with photos for insurance claims
- Call a professional plumber to identify and fix the source
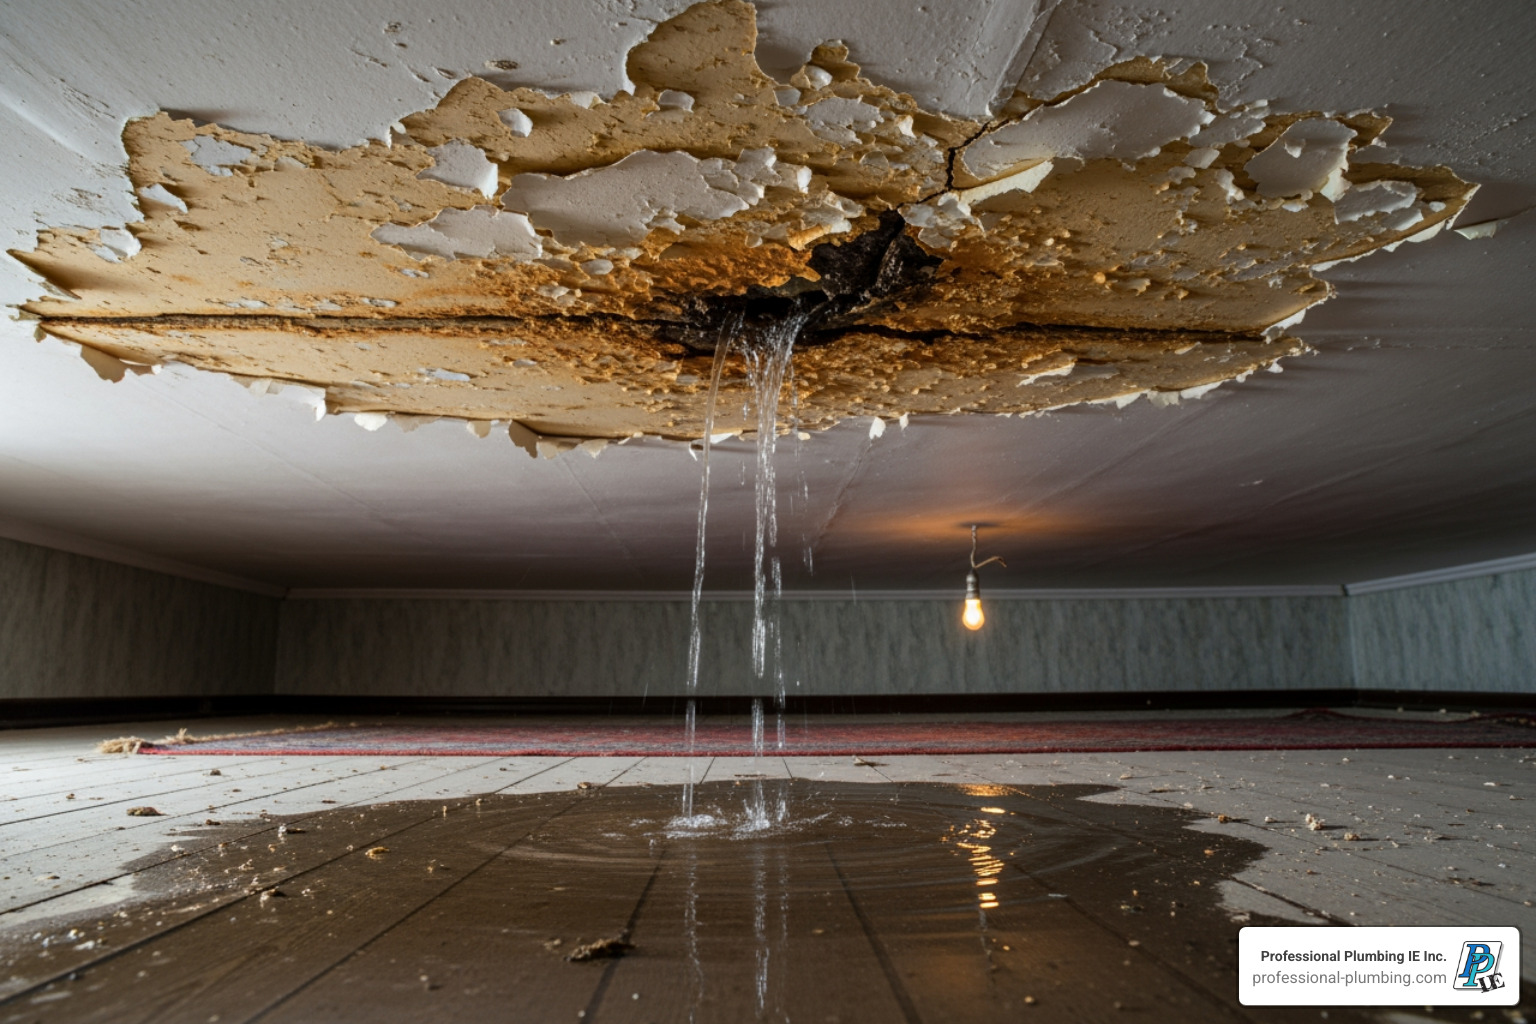
Few things are worse than seeing a brown stain spreading across your ceiling or water actively dripping into your home. Whether it’s a sudden gush or subtle signs like peeling paint and musty odors, ceiling water damage demands immediate attention.
Water damage is a common and costly home insurance claim. A small leak can cause extensive damage quickly. Within just 48 hours, mold can start growing in wet materials. Since a gallon of water weighs nearly 8.5 pounds, it doesn’t take much to overwhelm your ceiling’s structural integrity.
The good news? If you act fast and follow the right steps, you can minimize the damage and get your ceiling back to normal. This guide walks you through the complete ceiling water leak repair process—from emergency response to final finishing touches.
Warning signs you need ceiling water leak repair:
- Yellow, brown, or rust-colored stains on the ceiling
- Paint that’s peeling, bubbling, or flaking
- Sagging or bowed sections of ceiling
- Visible dripping or wet spots
- Musty smells indicating hidden moisture
- Mold growth, especially in corners
 Turn off power to affected room, 2) Contain water with buckets and tarps, 3) Shut off main water supply if leak is active, 4) Call a professional plumber to locate and repair the source - ceiling water leak repair infographic")
Step 1: Immediate Actions to Minimize Damage
The moment you spot that telltale drip or spreading stain on your ceiling, your heart might sink—but this is exactly when you need to spring into action. The faster you respond, the less extensive your ceiling water leak repair will be, and the more money you’ll save in the long run.
Before you do anything else, think about safety first. Water and electricity make a dangerous pair. If the leak is near a light fixture, ceiling fan, or you suspect water has reached electrical wiring, head to your breaker box and shut off the power to that room. Working with a flashlight is better than risking an electrical shock.
Now it’s time to contain the chaos. Grab buckets, pots, or trash cans and position them under the drip. Spread out plastic tarps or old towels to protect your floors and furniture. Water weighs about 8.5 pounds per gallon, so even a minor drip can add up quickly.
If your ceiling is sagging or bulging, it’s holding trapped water. Leaving it alone is risky, as it could burst. The solution is to carefully puncture the lowest point of the bulge with a screwdriver or awl. This seems counterintuitive, but it lets you control the water’s release, draining it into buckets instead of letting the ceiling collapse unexpectedly.
If the leak keeps flowing and it’s not raining, you likely have a plumbing problem. Locate your home’s main water supply valve and shut it off completely. This stops the leak at its source. The main shut-off valve is usually where the water line enters your house, often in a basement, crawl space, or utility room. Finding it now could save you thousands in future emergencies.
While managing the water, move your valuables, furniture, and anything else you care about out of harm’s way. Water spreads farther than you’d expect.
Before you get too caught up in the emergency, grab your phone and document everything. Snap photos and videos of the leak, the damage, and any wet belongings. Your insurance company will need this evidence for your claim, and detailed documentation can streamline the process.
One more safety note: if you use a ladder, ensure it’s on level, stable ground and don’t overreach. Falls are actually one of the leading causes of home injuries, so make sure your ladder is on level ground, fully stable, and that you’re not overreaching. A ceiling leak is stressful enough without adding a trip to the emergency room.
Step 2: Finding the Source of the Leak
Once you’ve contained the immediate crisis, the next critical step for effective ceiling water leak repair is to pinpoint where the water is coming from. This is like detective work, as water often travels far from its origin before appearing on your ceiling.

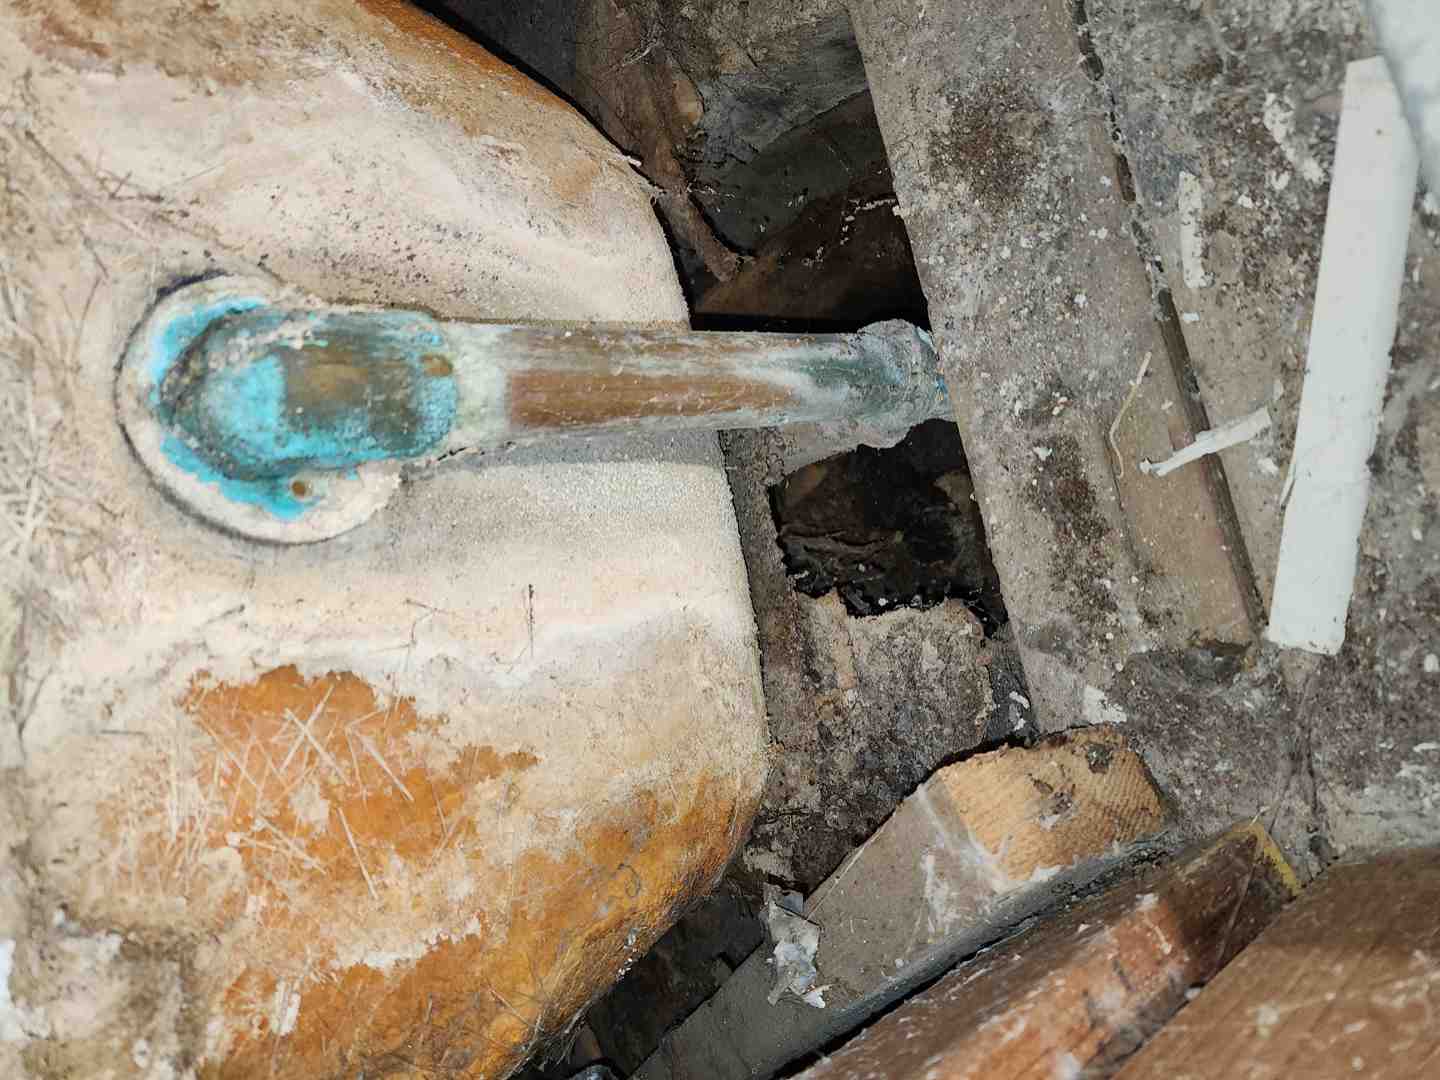
Water is sneaky; it can travel along pipes and beams before showing up. A drip in your living room might come from a bathroom pipe two rooms over, which is why finding the source is crucial.
If the leak is on a lower floor, you’re likely dealing with a plumbing issue from above, like an upstairs bathroom, laundry room, or attic water heater.
Leaking pipes are a common culprit. A small pinhole leak, a dramatic burst water supply line, or a loose joint can all saturate ceiling materials. In older homes, aging pipes affected by corrosion often fail. Even in Southern California, a cold snap can cause frozen pipes to burst in uninsulated areas.
Don’t overlook fixture failures. A leaking shower pan, a toilet with a bad wax seal, or a poorly caulked bathtub can send water to the ceiling below. If you notice other issues like low water pressure or discolored water, read our article on Signs That Your Plumbing Is Failing.
Your HVAC system could also be the cause. An AC unit in the attic has a condensate line that can get clogged, causing water to back up into your ceiling.
If leaks appear during rain, look up. Clogged gutters, roof-related issues like damaged shingles, or an old roof are common causes for top-floor leaks.
Appliances like a malfunctioning washing machine, dishwasher, or water heater on an upper floor can also leak.
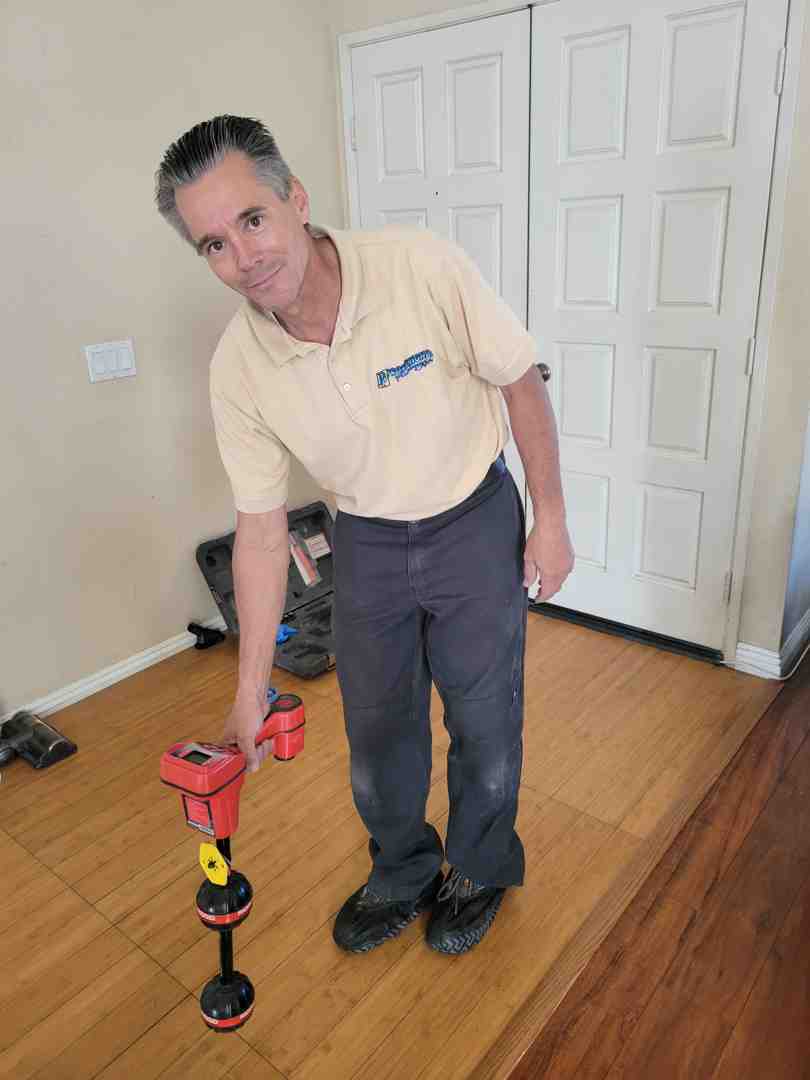
So, who should you call first? For any leak not obviously roof-related, we recommend calling a professional plumber. Most ceiling leaks originate from hidden plumbing. A skilled plumber has specialized leak detection equipment—like thermal imaging cameras and moisture meters—to pinpoint the source without tearing apart your ceiling.
We can quickly determine if it’s a pipe, fixture, or HVAC line. If our investigation points to the roof, we’ll let you know to contact a roofer. In our decades of experience serving Riverside, Orange County, Corona, and Fountain Valley, we’ve found that starting with a plumber saves homeowners time, money, and unnecessary repairs.
Step 3: The Ceiling Water Leak Repair Process
Alright, so you’ve stopped the leak and identified its source. Now it’s time to fix the damaged ceiling. This is where your ceiling water leak repair changes that water-stained mess back into a safe, beautiful ceiling.

Before patching or painting, the area must be completely dry. We can’t stress this enough. Mold can start growing in damp materials within just 48 hours.
Another reason to do this right: professional ceiling water leak repair typically costs between $45 and $55 per square foot, not including the original leak fix. Cutting corners now can lead to much bigger expenses later.
Safety first. Before starting, gear up with goggles to keep debris out of your eyes, a mask to avoid breathing in mold or drywall dust, and sturdy gloves.
Drying the Affected Area
Patience is key. Depending on the leak’s severity, your ceiling could take a few days to several weeks to dry completely. We know it’s frustrating, but rushing this step is asking for trouble.
To speed things along, use high-powered fans to move air across wet surfaces and a dehumidifier to pull moisture from the air. These dramatically cut down drying time.
How do you know when it’s dry? A moisture meter is invaluable. This tool gives accurate readings of moisture content in materials. Don’t go by looks alone—materials can feel dry but still hold moisture inside. The meter ensures you’re not sealing in future mold.
Removing Damaged Materials and Treating Mold
Once everything is bone dry, it’s time for controlled demolition. Any drywall that’s sagging, crumbling, or has dark mold spots needs to come out. We typically cut back to the nearest ceiling joists for clean, solid edges to work with.
Don’t forget the insulation. If it got wet, it needs to go. Wet insulation loses its insulating properties and is a perfect breeding ground for mold. Remove it carefully and dispose of it properly.
If you find mold, you need to treat it right. We use EPA-approved antimicrobial solutions on all affected surfaces. After treatment, we thoroughly clean the area. For airborne spores, a HEPA vacuum is essential—it traps them for good, unlike regular vacuums.
How to Patch and Finish Your Ceiling Water Leak Repair
Now your ceiling starts looking like a ceiling again. Gather your materials: replacement drywall matching your ceiling’s thickness (usually half-inch), joint compound (“mud”), drywall tape, screws, a quality stain-blocking primer, and matching ceiling paint.
Cut your new drywall piece to fit the opening. You might need to add 2×4 blocking between joists to give the new drywall a solid backing. Screw the new drywall into place, ensuring it’s flush with the surrounding ceiling.
Next is taping and mudding. Apply drywall tape over all seams, then spread a thin coat of joint compound over the tape and screw holes. Let it dry, then apply a second, wider coat. Most repairs need two or three coats. Lightly sand between each coat to smooth any bumps.
When the final coat is dry, sand the repair area until it’s perfectly smooth. Run your hand over it—if you can feel the patch, keep sanding.
Now for the secret weapon: stain-blocking primer. This is essential for ceiling water leak repair. It seals everything in and prevents old water stains from bleeding through new paint.
Finally, it’s time to paint. For small repairs, you can paint just the patch. For larger repairs, painting the entire ceiling ensures a perfect color and finish match, leaving no trace of the damage.
Step 4: Preventing Future Ceiling Leaks
You know what’s better than becoming an expert at ceiling water leak repair? Never having to deal with one in the first place! A little preventive care now can save you from a lot of headaches later.
Most ceiling leaks are the result of small issues that gradually get worse. The good news is that proactive maintenance can help you catch these problems early or avoid them altogether.
Regular plumbing inspections are your first line of defense. Small leaks can hide behind walls for months, quietly causing damage. A professional inspection can spot warning signs—corroded pipes, loose fittings, or deteriorating seals. Our team at Professional Plumbing Inc. offers a wide variety of plumbing services that include thorough inspections to catch problems before they become emergencies.
Don’t forget your appliances. Your washing machine, dishwasher, and water heater have supply lines that can fail. Every few months, check these connections for kinks, corrosion, or moisture. Catching a worn-out hose before it bursts can save you thousands.
If you have upper floors, maintaining your roof and gutters is crucial. Have your roof inspected annually. Clean your gutters regularly—clogged gutters are a common cause of water backing up into your home.
Proper ventilation is another overlooked factor. Bathrooms and kitchens generate humidity that can cause problems if not vented. Use your exhaust fans during and after showers or cooking to protect your home.
In areas like attics, insulating your pipes is smart protection. While we don’t see much freezing weather in Riverside, Orange County, Corona, and Fountain Valley, occasional cold snaps can catch unprotected pipes by surprise.
Finally, consider leak detection devices. These smart sensors sit near water heaters or under sinks and alert you the moment they detect moisture, catching problems at the first drip.
These preventive steps protect your home, belongings, and peace of mind. If you need help with inspections or maintenance, we’re here for you. We’d much rather help you prevent a leak than repair one!
Frequently Asked Questions about Ceiling Water Leaks
Let’s tackle some of the most common questions we hear from homeowners dealing with ceiling leaks.
Can a ceiling collapse from a water leak?
Yes, a ceiling absolutely can collapse from a water leak if left unaddressed. Each gallon of water weighs about 8.5 pounds. As ceiling materials absorb that water, they become heavy and structurally compromised. Drywall, in particular, can turn soft and soggy, losing its ability to support itself.
The warning signs of an impending collapse are dramatic. If you notice significant sagging or bowing, that’s a red flag. Cracking sounds or creaking noises are even more alarming. You might also see large, rapidly expanding stains or pieces of drywall starting to crumble.
If you spot any of these signs, evacuate the area immediately and call professionals. Your safety is the top priority.
Does homeowners insurance cover ceiling water leaks?
In most cases, yes. Homeowners insurance typically covers ceiling water leak repair and restoration when the damage is from a sudden and accidental event. This includes a burst pipe, a malfunctioning appliance, or storm damage.
However, coverage can be tricky. If the leak was due to negligence (like ignoring a slow drip for months), your claim might be denied. Flooding from natural disasters requires a separate flood policy. Sewer or drain backups often need an additional endorsement to be covered.
The best advice is to review your specific policy and talk to your insurance agent. It’s better to understand your coverage before you need it.
How long does it take for a ceiling to dry out after a leak?
Drying time can range from a couple of days to several weeks. It depends on a few key factors.
The severity and duration of the leak matter a lot. The type of materials in your ceiling also plays a role; drywall and insulation absorb lots of water. Your local humidity levels and ventilation are also crucial.
This is where professional help makes a difference. We use high-powered fans and commercial-grade dehumidifiers to speed up the drying process. These are industrial-strength tools designed to pull moisture out quickly. We also use moisture meters to ensure everything is completely dry before any repair work begins. This step is essential for preventing mold and ensuring your ceiling water leak repair lasts.
Conclusion: When to Call a Professional for Your Ceiling Repair
Let’s recap. A ceiling water leak repair isn’t something to put off. The moment you spot a stain or drip, act fast. Contain the water, protect your home, and find the source of the leak. Finally, repair properly by thoroughly drying everything, removing damaged materials, treating mold, and restoring your ceiling.
Honestly, while some homeowners can handle cosmetic touch-ups, there’s a big difference between DIY fixes and professional leak detection and repair. Finding a hidden leak’s source is difficult. Water travels through walls and along joists, so a leak in your living room might actually originate from a bathroom two rooms over.
That’s where we come in. Our team at Professional Plumbing Inc. has nearly 40 years of experience serving families and businesses throughout Orange County, Riverside, Corona, and Fountain Valley. We have the specialized tools—like thermal imaging cameras and moisture meters—to pinpoint problems quickly and accurately. More importantly, we fix it right the first time.
Calling a professional early can save you money in the long run. A small, improperly repaired leak can lead to extensive mold growth, structural damage, and sky-high repair bills. We can catch these issues before they spiral out of control.
Whether you’re dealing with an active leak or have noticed warning signs like musty odors or ceiling stains, don’t wait. For expert leak detection and plumbing repair in Riverside, contact our team today. We’re a family-owned business that treats your home like our own, and we’re committed to getting you back to normal as quickly and affordably as possible. Your peace of mind is worth that phone call.


Pingback: What causes slab leaks: Top 5 Hidden Threats
[…] underground. This hidden nature makes detection challenging and repairs more complex. Unlike a Ceiling Water Leak Repair where water stains give away the location, a slab leak’s symptoms can be subtle and […]