Electric Water Heater Install: Ultimate Guide 2024 – Safe DIY
Riverside Electric Water Heater Install: What Homeowners Need to Know
An electric water heater install can be a doable DIY project for handy homeowners, but it demands careful planning, attention to safety, and compliance with local codes in Riverside, Corona, Eastvale, and Norco.
Quick Answer: Can I Install an Electric Water Heater Myself in Riverside County?
- Yes, if you have basic plumbing and electrical skills – For homeowners in areas like Riverside’s Wood Streets, Corona’s Sierra Del Oro, Eastvale’s Orchard neighborhoods, or Norco’s horse properties near 6th Street, a straightforward replacement typically takes 4–5 hours.
- You’ll usually save $500–$750 vs. professional installation – Local plumbers in Riverside County often charge $200–$450 for labor alone.
- Safety first – Turn off power at the breaker, verify it’s off with a voltage tester, and never apply power before the tank is completely full of water.
- Permits are commonly required – Cities like Riverside, Corona, Eastvale, and Norco typically require permits and inspections for water heater replacement.
- Key steps: Drain old unit → Connect plumbing → Fill tank completely → Connect electrical → Test.
When to call a pro: If your panel doesn’t have a dedicated 240V circuit, if you’re unsure about code requirements (like seismic strapping and drain pans), or if you want full warranty protection.
Compared to gas models, electric heaters remove some complexity. But you’re still dealing with:
- 240-volt power that can cause severe injury or fire if wired incorrectly
- Pressurized hot water that must be safely contained and relieved by a working T&P valve
- A heavy tank that needs proper positioning, earthquake strapping, and leak protection
In this guide, I’ll walk you through a safe, code-conscious electric water heater install, with focus on:
- What Riverside, Corona, Eastvale, and Norco homeowners need to watch out for
- Local code topics like earthquake strapping and drain pans
- When DIY makes sense, and when it’s smarter to bring in a licensed plumber
Whether you’re replacing a tank in a Riverside garage off Magnolia Avenue, upgrading in Corona near Dos Lagos, swapping out an older unit in an Eastvale home near Eleanor Roosevelt High School, or changing a heater in a Norco barn-style garage by the George Ingalls Equestrian Event Center, the core steps are the same—but local code details matter.
I’m Chris Kirsten, and I’ve spent decades helping Riverside County homeowners through Professional Plumbing IE Inc. We’ve handled thousands of electric water heater install jobs across Riverside, Corona, Eastvale, and Norco. My goal with this guide is to help you make informed choices, avoid mistakes, and know when it’s time to call in a professional.

Before You Begin: Planning Your Electric Water Heater Install
Proper planning is crucial for a smooth, safe electric water heater install in Riverside, Corona, Eastvale, or Norco.
Essential Tools and Materials for the Job
A successful DIY install requires the right plumbing and electrical tools:
- Tools:
- Pipe wrenches (two are helpful)
- Adjustable wrenches
- Tubing cutter or PEX crimping tool
- Wire cutters/strippers
- Screwdrivers
- Non-contact voltage tester (critical for safety)
- Level and tape measure
- Garden hose (for draining)
- Shop vacuum and bucket
- Materials:
- New electric water heater
- Flexible water connectors
- Teflon tape and pipe joint compound
- Drain pan (commonly required locally)
- New T&P Relief Valve
- Discharge pipe (must withstand 250°F)
- Dielectric unions
- New shutoff valve
- Wire nuts and electrical conduit
- Strain relief
- Safety Gear: Work gloves, safety goggles, dust mask

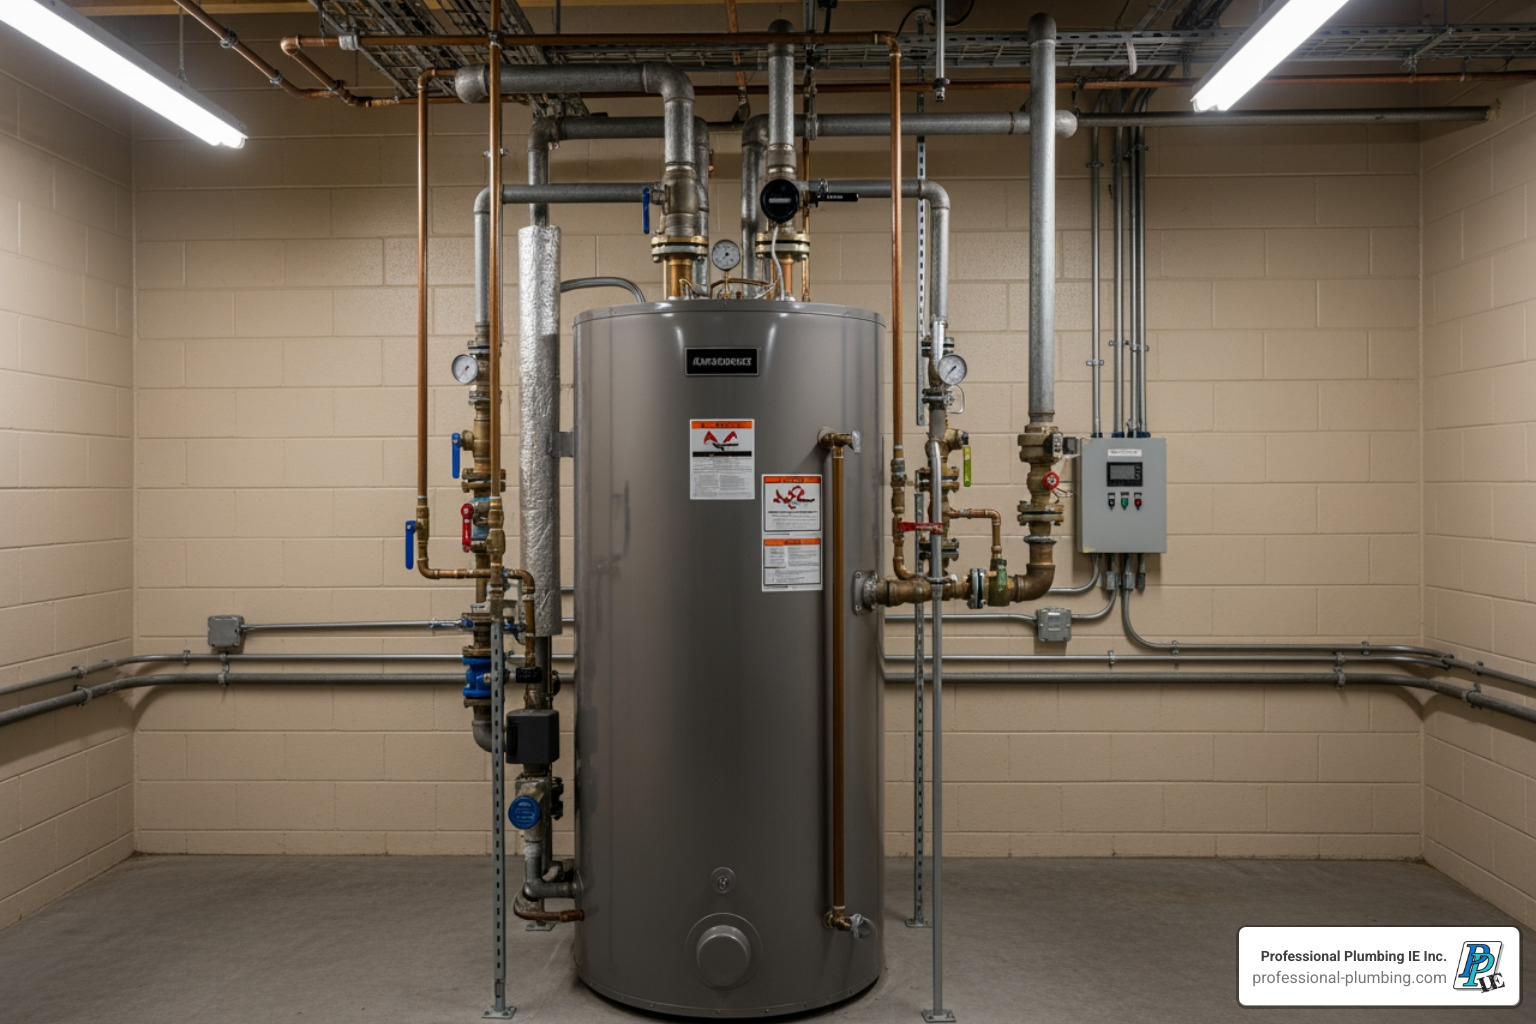
Choosing the Right Location and Checking Codes
Your water heater’s location is vital for efficiency and code compliance. In Riverside County, inspectors look closely at placement, strapping, and leak protection.
- Common Locations: Garages are typical in Norco’s ranch-style homes and Eastvale tracts near Schleisman Road. Older Riverside homes near Riverside Plaza or Corona neighborhoods like South Corona often have heaters in closets or utility rooms.
- Clearance Requirements: Most manufacturers recommend at least 6 inches of clearance on all sides.
- Level Surface: The water heater must sit on a level, sturdy surface.
- Drain Pan Importance: Often required in multi-story homes off La Sierra or in Corona Hills when leakage could damage living space below.
- Local Codes and Permits: Check with:
- City of Riverside Building & Safety (Canyon Crest, Orangecrest)
- Corona Building Department (Sierra Del Oro, Dos Lagos)
- Eastvale Building & Safety (Harada Heritage Park area)
- Norco Building Department (Hamner Ave, Ingalls Park)
- California Seismic Strapping: Mandatory with two approved metal straps anchored to wall studs.
For detailed information on local requirements, explore our water heater services.
Preparing Your Plumbing for the New Unit
Before installing, ensure your existing plumbing is ready:
- Code Compliance Checks: Newer water heaters (post-2015) are often wider and taller due to added insulation.
- Shutoff Valve Installation: Required in the cold water inlet line.
- Thermal Expansion Tanks: Often required in closed systems, common in newer Eastvale subdivisions near Eleanor Roosevelt High School.
- Pressure Reducing Valve: If home pressure exceeds 80 psi, a PRV is recommended.
For a comprehensive general guide, refer to this detailed installation guide (Note: Local codes always take precedence).
The Complete Step-by-Step Electric Water Heater Installation Guide
Now let’s get into the step-by-step process of your electric water heater install. Safety is our top priority throughout.
Step 1: Safely Draining and Disconnecting the Old Unit
- Turn Off Power at the Breaker: Locate your electrical panel and turn off the 240-volt breaker.
- Verify with a Voltage Tester: Use a non-contact voltage tester to confirm power is off. Never skip this step.
- Shut Off Cold Water Supply: Close the cold water inlet valve.
- Open a Hot Water Faucet: Open an upstairs faucet to relieve pressure.
- Connect Garden Hose: Attach a hose to the drain valve.
- Drain Tank Completely: Route hose to a drain and open the valve. This can take an hour.

- Disconnect Water Lines: Once empty, disconnect cold and hot water lines.
- Disconnect Electrical Wires: Remove access panel and carefully disconnect wires.
- Remove Old Unit: With help, move the old water heater out.
Step 2: Plumbing Your New Electric Water Heater Install
- Position New Heater: Place in drain pan on level surface.
- Install T&P Relief Valve: Thread into designated opening with Teflon tape.
- Discharge Pipe Requirements: Attach 3/4 inch pipe (copper or CPVC) running downhill to safe drain.
- Connect Water Supply Lines:
- Use flexible stainless steel connectors for easier installation
- Install dielectric unions to prevent corrosion
- Wrap threads with Teflon tape
- Connect cold inlet (blue/right) with shutoff valve
- Connect hot outlet (red/left)
- Tighten with two wrenches
If you’re noticing frequent issues, check our article on signs that your water heater needs repair pt 1.
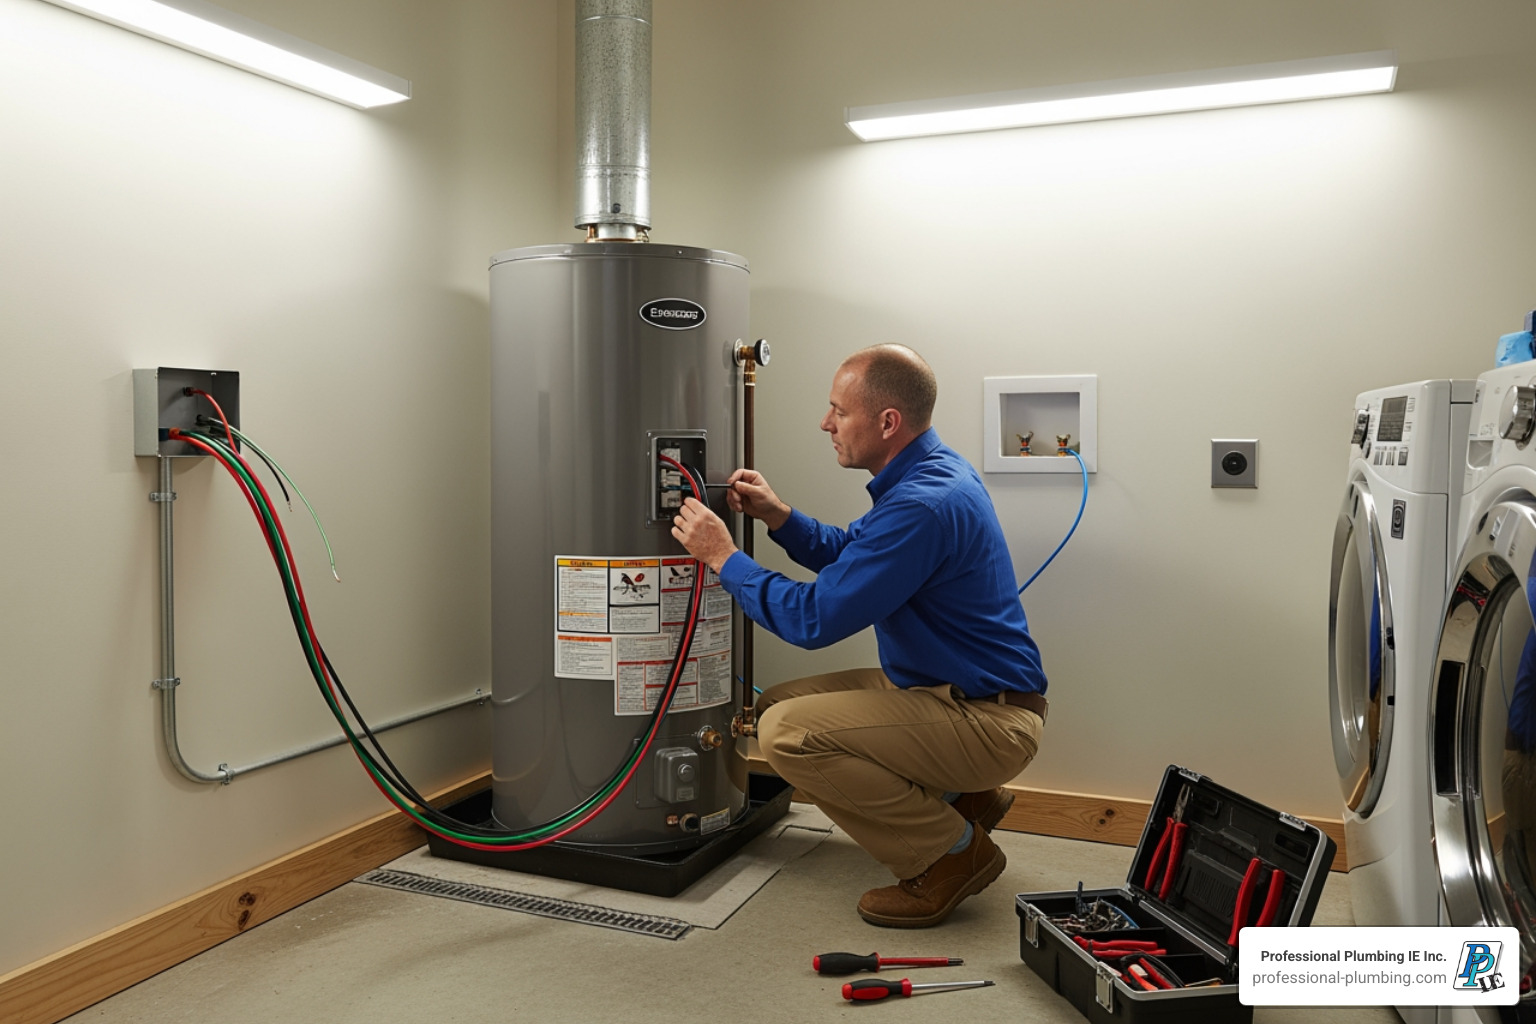
Step 3: Making the Correct Electrical Connections
CRITICAL SAFETY WARNING: Always verify power is OFF before touching any wires.
- Ensure Power is Off: Double-check with voltage tester.
- Match Voltage: Confirm 240V matches your home’s supply.
- 240-Volt Circuit: Requires dedicated 30-amp circuit with 10-gauge wire.
- Connect Ground Wire: Attach to green ground screw.
- Connect Power Wires: Black to black, red to red with wire nuts.
- Secure Wire Nuts: Tug gently to confirm secure connection.
- Replace Junction Box Cover: Install strain relief where cable enters.
Step 4: Filling the Tank and Purging the System
- Prevent Dry-Firing: Never turn on power before tank is full.
- Close Drain Valve: Ensure it’s fully closed.
- Open Cold Water Supply: Slowly open valve to fill tank.
- Open Highest Hot Water Faucet: Let air escape as tank fills.
- Run Until Steady Stream: Confirms tank is full and air-free.
- Check for Leaks: Inspect all connections thoroughly.
For leak issues, learn about a temporary fix for leaking hot water heater.
Finalizing Your Installation and Future Care
With the tank filled and connections made, the final steps are to power up, test, and plan for future maintenance.
Step 5: Powering Up, Testing, and Setting the Thermostat
- Final Leak Check: Before restoring power, perform one last thorough check of all plumbing connections for any leaks.
- Turn On Circuit Breaker: Go back to your electrical panel and turn on the circuit breaker for the water heater.
- Listen for Heating Sounds: After a few minutes, you might hear a faint hum or sizzling sound as the heating elements begin to work.
- Recommended Thermostat Setting: The factory thermostat setting is typically around 120°F (49°C). We recommend starting here. This temperature is hot enough for most household needs and significantly reduces the risk of scalding.
- Scald Risk Explained: Water temperatures above 120°F can cause severe burns very quickly. For example, water at 140°F can cause third-degree burns in less than 5 seconds. If you desire a higher temperature, we strongly recommend installing thermostatic mixing valves at points of use (faucets, showers) to blend hot and cold water to a safe temperature.
- Adjusting Temperature: Most electric water heaters have two thermostats (upper and lower) under access panels. Ensure both are set to the same temperature.
- First Heating Cycle Time: It may take several hours for a full tank of cold water to reach the desired temperature. Be patient!
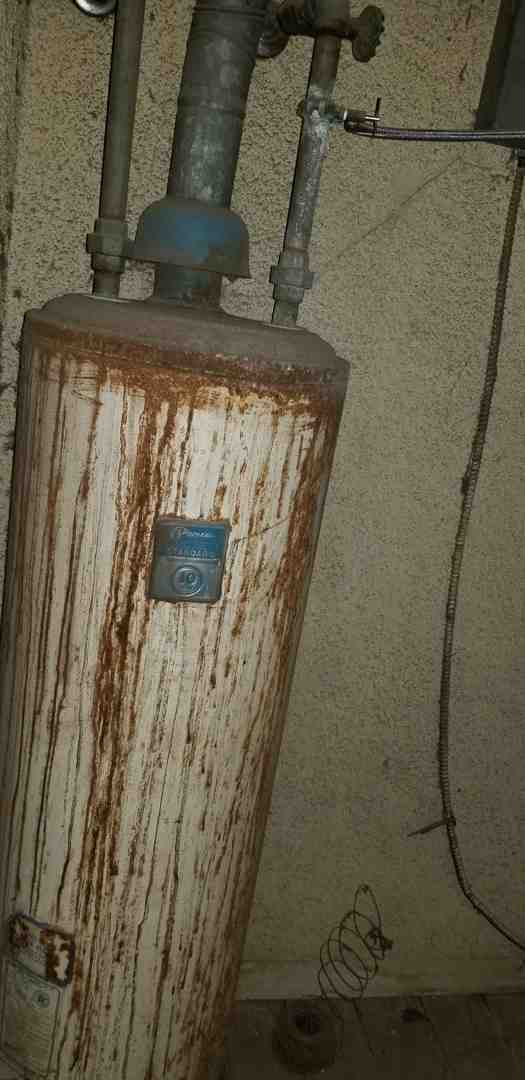
Step 6: Essential Maintenance for Your New Water Heater
Regular maintenance is key to your new water heater’s longevity and efficiency.
- Annual Tank Flushing: Sediment can build up at the bottom of the tank, reducing efficiency and potentially causing premature failure. We recommend draining and flushing your tank annually to remove this buildup.
- Anode Rod Inspection: The anode rod is a sacrificial metal rod inside your tank that corrodes instead of the tank’s lining, protecting it from rust. We advise inspecting it every 1-3 years (more often with softened water) and replacing it when it’s depleted (diameter less than 3/8 inch).
- Testing the T&P Valve: Manually test the T&P (Temperature and Pressure) Relief Valve at least once a year by lifting the test lever for a few seconds. This ensures it’s not seized and can properly release pressure if needed. Be cautious, as hot water will discharge.
For more insights into keeping your water heater in top shape, check out our article on hot water tank service.
DIY vs. Pro: Making the Right Choice
Deciding between DIY and a pro for your electric water heater install is a big choice for Riverside and Corona homeowners. While DIY saves money, a professional installation provides peace of mind and expertise.
A Look at Heat Pump vs. Traditional Electric Water Heater Install
You’ll find two main types of electric water heaters: traditional resistance-element models (covered in this guide) and more efficient heat pump water heaters (also known as hybrid electric).
- Heat Pump Efficiency: Heat pump water heaters are significantly more energy-efficient. They work by extracting heat from the surrounding air and transferring it to the water, rather than directly generating heat.
- Installation Differences: While both are electric, heat pump water heaters have unique installation considerations:
- Condensate Drain Line: Because they dehumidify the air, heat pump models produce condensate that needs to be drained, similar to an air conditioner. This requires routing a PVC pipe to a nearby floor drain or installing a condensate pump.
- Airflow and Space Requirements: Heat pump water heaters need a minimum of 450 cubic feet of surrounding air space to operate efficiently and require good airflow. This makes them best for unconditioned spaces like a garage or basement, not small closets, especially in areas like Norco where garages are common.
- Noise Considerations: They generate some noise, similar to a dishwasher, and exhaust cool air. This might influence placement if installed near living areas.
- Cost Savings: While the upfront cost of a heat pump water heater is higher, the DIY savings are estimated at $500–$750, and their energy efficiency can lead to substantial long-term savings on utility bills.
If you’re interested in exploring these energy-efficient options, you can explore heat pump water heaters.
When to Call a Professional Plumber
While a DIY electric water heater install is achievable, calling a pro is often the smarter, safer, and more cost-effective choice.
Here’s a comparison to help you decide:
| Feature | DIY Installation | Professional Installation |
|---|---|---|
| Cost Savings | $500–$750 (unit cost: $150–$400 + DIY labor) | Higher initial cost (plumber labor: $200–$450 + unit) |
| Time | 4–5 hours (can extend significantly with issues) | 6–8 hours (often completed in a day) |
| Safety/Risk | High risk of electrical shock, scalding, leaks, fire | Minimized risk with licensed, insured professionals |
| Code Compliance | Requires thorough research and understanding of local codes in Riverside, Corona, etc. | Guaranteed compliance with all local codes and regulations |
| Warranty | May be voided if installation errors occur | Preserves manufacturer warranty, often includes labor warranty |
| Expertise | Relies on homeowner’s existing skills and research | Access to years of experience and specialized tools |
Hire a professional plumber if:
- Complex Plumbing: Your existing plumbing needs significant modifications, or you’re uncomfortable with soldering or working with specific pipe materials.
- No Dedicated 240V Circuit: If your home doesn’t have the correct 240-volt, 30-amp circuit with 10-gauge wiring, creating one is a job for a licensed electrician, not a DIY project.
- Unsure About Codes: Local codes in Riverside, Corona, Eastvale, and Norco can be complex. If you’re unsure about permit requirements, seismic strapping, or thermal expansion tanks, a professional will ensure everything is compliant.
- Peace of Mind: For many homeowners, the assurance that the job is done correctly, safely, and is fully warranted is worth the investment.
- Heat Pump Water Heater: The additional condensate drainage and specific airflow requirements of heat pump water heaters can add complexity that’s best left to a pro.
When it comes to something as vital as your home’s hot water system, ensuring a safe and compliant installation is paramount. Considering a water heater replacement in Riverside? We’re here to help.
Conclusion: Enjoy Your New Hot Water Supply
Completing a DIY electric water heater install is rewarding but requires care. This guide covered the key steps, from planning and safety to the final connections and maintenance, including specifics for Riverside County homeowners.
While DIY savings are appealing, safety is non-negotiable. The risks from 240-volt electricity and pressurized water systems are real, and code compliance is essential to protect your home and ensure your warranty remains valid.
For a guaranteed, code-compliant installation in the Riverside area, trust the experts at Professional Plumbing IE Inc. With nearly 40 years of local experience, our family-owned and operated team is dedicated to providing professional, high-quality service at affordable rates. We handle everything from complex electrical upgrades to ensuring all California seismic requirements are met, giving you complete peace of mind.
Whether you decide to tackle your electric water heater install yourself or call in the pros, we hope this guide empowers you with the knowledge needed to make the best decision for your home and family. If you’re in Riverside, Corona, Eastvale, Norco, Jurupa Valley, or Mira Loma and need assistance with your water heater, don’t hesitate to contact us for professional water heater services. We’re always here to help you power up your home with reliable hot water.